One of the most effective techniques a toy artist can employ is drybrushing. Drybrushing is the act of applying a very small amount of paint lightly across a surface so that only the slightest amount is transfered from brush to surface. It allows you to build up and blend colors to give depth and weight to your work. The most effective drybrushing is done over a slightly textured surface; the raised portions of the surface will grab the drybrushed paint and allow the color in the lower portions to show through. It's a really cool effect that's super easy to achieve.
First off... you're going to want to give your paint a slightly textured surface to which to adhere. The easiest way to do that is to prime the surface with a layer or two of paint. I use acrylic paint because it adheres to virtually any plastic used in toys--there are a few exceptions, but most designer vinyl toys are great surfaces for painting. Using enamels or oil paints can result in poor adhesion, and a paint job that will remain sticky FOREVER!!!!! BOOGAH!!!
I like to work from dark to light-- I don't know why I do, but I just like it. I've base coated this toy, a 3 inch tall Dunny from KidRobot, with flat black acrylic paint. Flat paint will give you a more textured surface, and texture is your friend!
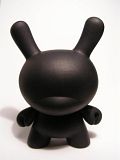
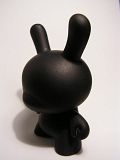
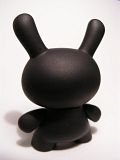
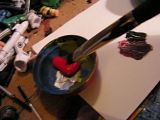
Ignore my messy work area-- I'm one of those quirky weirdos that can't have a tidy work-space... I tried it and it sucks. I use almost any small, shallow container I can get my hands on to mix my paints. I find that the caps of those capsules you get out of bubblegum machines to be PERFECT for this. I also use the trays that action figures come in. Bottle caps, medicine cups, and cut-off paper cups will do just fine too.
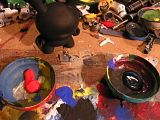
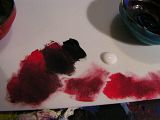
OK... so I realize that it's hard to see my paint for the clutter, so I brought out this piece of craft foam to mix paint. One neat little tip: using craft foam is a REALLY good way to help clean excess paint from your brush as you work; while you are mixing the paint the foam is absorbing it-- you wind up with a pretty dry brush when you do this.
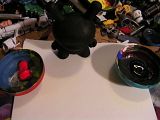
To build up from black you have to use a little black. The idea is to blend the color on your brush from black to red. The reason for doing this is to create a gradual color gradient from dark to light. So I take a little black and a little red and apply them close to each other. This allows you to quickly grab a tiny bit from each and mix it as you go along. It also serves as a visual guide to the history of the values you've created as you go along.
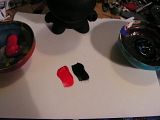
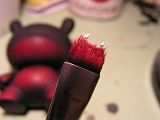
Using your brush, snag a little bit of black and a little bit of red and mix them up. You want a color that's almost black with a hint of red. Use a paper towel to wipe all but the tiniest amount of paint from the brush. You see that brush there? I've been using that brush for about 8 years. It's a cheap-o Wal-Mart special. It came in a bag of 15 brushes for 5 bucks, and it is still the best brush I own for doing dry brushing. I've had brushes that cost three times what that bag of brushes cost that didn't work as well as this one does. It looks like it has been to hell and back, but it still works like a charm. In later pictures you'll see how it has adapted to a curved shape from being scraped across surfaces over the years!
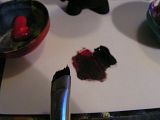
Using the color you mixed up, lightly brush the surface of the toy. If the new color barely shows up, you did it right. If you get globs of paint on the surface, you might want to lighten your touch or wipe off some more paint from the brush-- maybe even both. You're only wanting to lay down the smallest amount of color.
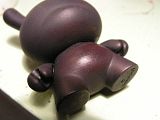
Grab some more red and mix it into the last glob of paint you mixed. You're building up from black to red, remember?
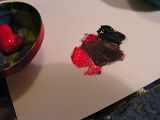
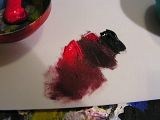
Here's the next few applications of paint that has been built up from black to red. You'll want to paint a slightly smaller area than the last you painted each time you paint... you're not building up the color; you're building a transition to a smaller highlighted area. This gives the object you're painting a depth that makes it pop visually. Darker colors are perceived by the brain to be farther from the eye while lighter colors do the exact opposite. So, in a sense, you are toying with people's minds-- you're a magician!!!
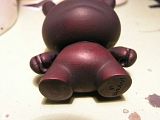
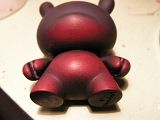
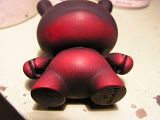
Now that you've built up the color to a vibrant red, you want to just knock it out of the park! To really make the surface look like it's going to jump out at you, use the tiniest bit of white! See that snaggly brush? The veteran of a bazillion drybrush attacks!
And here you have it... you've given the Dunny a glowing belly!!! But more than that you can see how the surface is no longer flat black... without sculpting any details on the toy, you can trick the eye into believing there's more there than a flat surface.
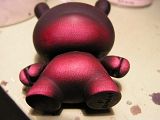
Try it with different colors and try blending them together. Experimenting is the best way to learn everything you can. Just remember: you can't really mess up! If you do, just paint over it with flat paint and go back at it again. Each layer of color you paint over gives your work a bit of extra character... you never know what kind of crazy stuff you'll find sitting right below the surface of your toy!
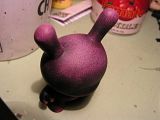
Hope that helps! If any of these tips helped out, please let me know, so I can help out more in the future. If any of these tips caused your head to explode like a balloon full of chili, please let me know and send video or pictures. I'm sick and twisted that way.



No comments:
Post a Comment